In our previous post, we covered how to set up git send-email for kernel development. Now, it’s time to put that setup to use. This guide will walk you through the process of making your very first change to the Linux kernel, using the 6.19.0-rc4 release as our target.
1. Creating a User-Specific Git Configuration#
Before touching any code, you must ensure Git is configured correctly. Linux kernel developers are strict about authorship and sign-offs. Create or edit the .gitconfig file in your home directory:
[user]
    name = Your Name
    email = your.email@example.com

[format]
    signoff = true

[core]
    editor = vim

[sendemail]
    smtpserver     = mail.xxxx.com
    smtpserverport = portum
    smtpencryption = tls
    smtpuser       = user
    smtppass       = password
Critical Rules for Identity#
- Email Consistency: The email in your
.gitconfigmust match the email you use to send patches. If theFrom:header and theSigned-off-by:line differ, your patch will be rejected. - Sign-off: By adding
signoff = true, Git automatically appends aSigned-off-byline to your commits. This certifies that you have the right to submit the code under the Developer’s Certificate of Origin (DCO). - Legal Name: Use your real, full legal name in the
namefield.
2. Kernel Configuration Theory#
The Linux kernel is incredibly flexible. When dealing with drivers, you generally have three options:
- Disabled: The driver is not compiled at all.
- Built-in (
y): The driver is part of the mainvmlinuximage and loads at boot. - Module (
m): The driver is compiled as a separate.kofile and loaded on demand (e.g., viamodprobe).
Best Practice: Configure drivers as modules whenever possible. This keeps the initial kernel image small and allows you to test changes by simply reloading the module without rebooting the entire system.
Handling New Releases#
When moving to a new version like 6.19.0-rc4, you often start with your existing distribution config.
cp /boot/config.latest .config
make oldconfig
make oldconfig will prompt you for any new configuration options introduced in the new release. You can also run make listnewconfig to see what’s new.
3. Preparing Your Workspace#
We’ll work with the mainline kernel. First, let’s set up our remotes and create a dedicated branch for our work.
cd linux_mainline

# Add the official Torvalds tree as a remote
git remote add linux git://git.kernel.org/pub/scm/linux/kernel/git/torvalds/linux.git
git fetch linux

# Create and checkout a new branch
git checkout -b work
4. Making Changes to a Driver#
We’ll use the uvcvideo driver (USB Video Class) as an example. It’s the driver for most webcams.
Locate the Source#
Use git grep to find where the driver lives:
git grep uvcvideo -- '*Makefile'
This points us to drivers/media/usb/uvc/.
Modify the Code#
Let’s add a simple print statement to the probe function in drivers/media/usb/uvc/uvc_driver.c. This function runs when the hardware is detected.
static int uvc_probe(struct usb_interface *intf,
                     const struct usb_device_id *id)
{
        // ... existing code ...
        int ret;

        pr_info("I changed uvcvideo driver in the Linux Kernel\n");

        if (id->idVendor && id->idProduct)
        // ... rest of the function ...
}
5. Compiling and Installing#
Now, let’s build the kernel (specifically version 6.19.0-rc4).
- Clone/Update Kernel: Ensure you are on the
6.19.0-rc4tag/branch. - Configure:
cp /boot/config.latest .config make oldconfig - Build:
make -j$(nproc) - Install Modules and Kernel:
sudo make modules_install install - Update Bootloader:
sudo update-initramfs -c -k 6.19.0-rc4
sudo update-grub
6. Testing Your Patch#
If you configured uvcvideo as a module (CONFIG_USB_VIDEO_CLASS=m), you can test it immediately:
# Unload the existing module
sudo rmmod uvcvideo

# Load your new module
sudo modprobe uvcvideo

# Check the logs
dmesg | grep "I changed"
If you see your message in dmesg, congratulations! Your code is running in the kernel.
Example: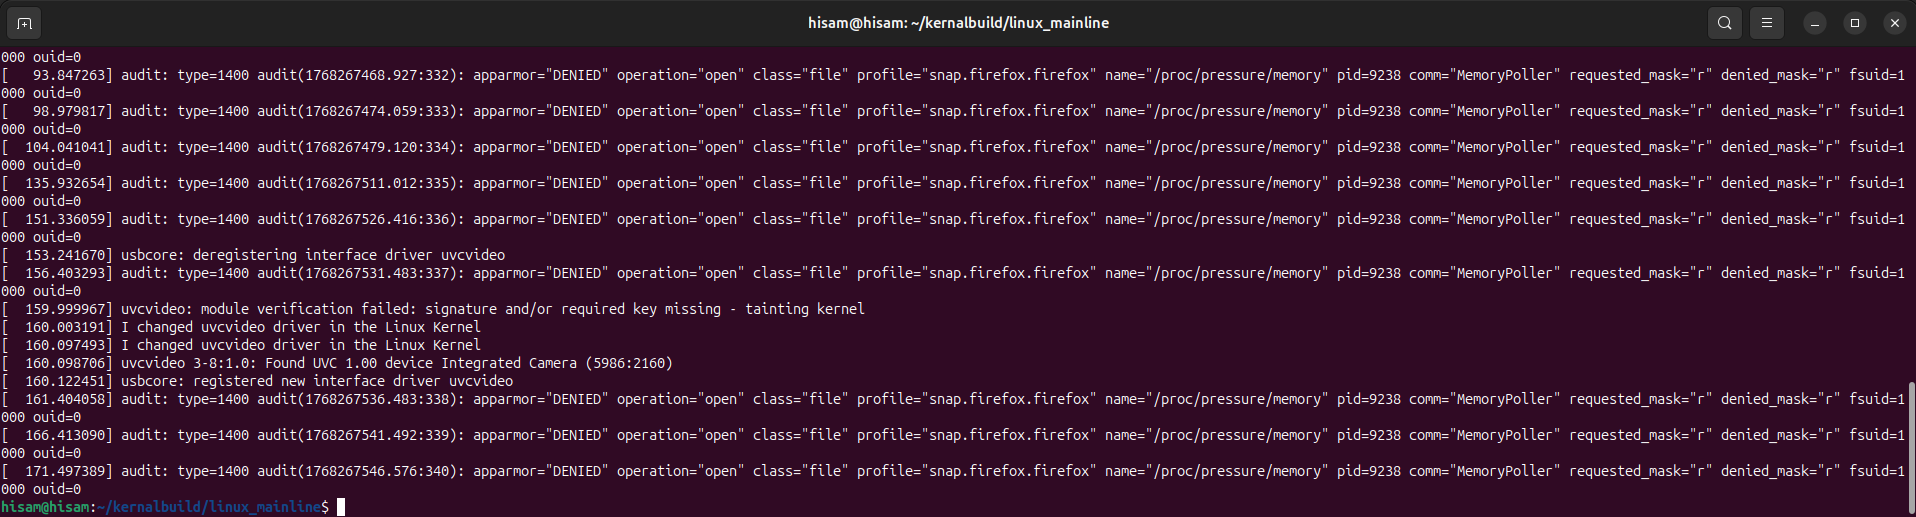
7. Committing and Formatting the Patch#
Style Check#
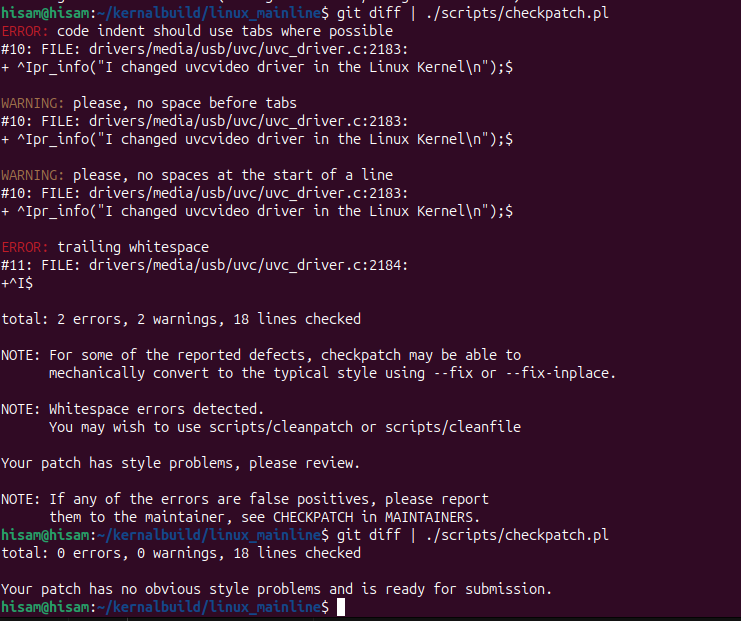
Before committing, always run the kernel’s coding style checker:
git diff | ./scripts/checkpatch.pl
Example:
Create the Commit#
git commit -a
When writing the commit message, focus on why the change is needed, not just what the code does.
Generate the Patch File#
Finally, generate the .patch file that you will eventually email to the maintainers:
git format-patch -1 <commit_id>
This creates a file named something like 0001-media-uvc-Add-logging-to-probe.patch. You are now ready to send your first contribution!